
Near Field Communication (NFC) is a set of short-range wireless technologies, typically requiring a distance of 4 cm or less to initiate a connection. NFC allows you to share small payloads of data between an NFC tag and an Android-powered device, or between two Android-powered devices.
Android-powered devices with NFC simultaneously support three main operation modes:
NFC Tags, sometimes referred to as smart tags, are programmed with just about any sort of information and letting you read them with a smartphone or another NFC-capable device. For example, they can look as plastic cards or can be embedded in different things. (Pic. 1)
Pic. 1 NFC tag
Tags can be of the following types:
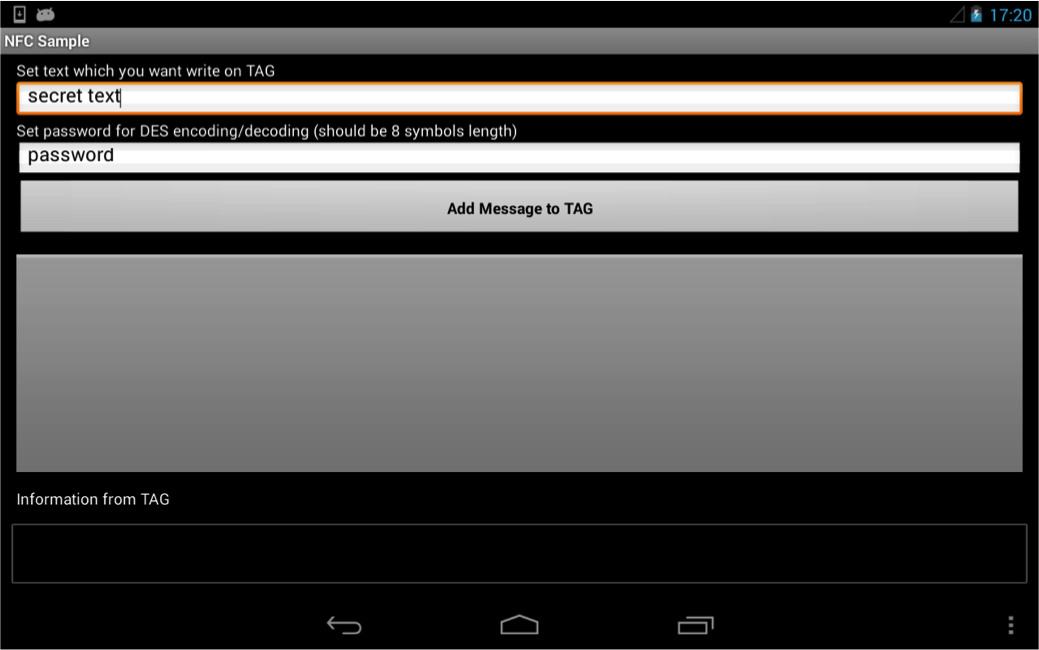
Today we are going to demonstrate how to use reader / writer mode.
Our application has following capabilities:
DES algorithm implementation is used for encryption / decryption.
About NFC using
First of all you should add this permission to AndroidManifest file for NFC functionality use.
<uses-permission android:name="android.permission.NFC">
</uses-permission>
Then initialize NfcAdapter.
NfcAdapter nfcAdapter = NfcAdapter.getDefaultAdapter(this); Note: not all devices support NFC functionality. To prevent crashes we’d like to recommended to check NfcAdapter.
if (nfcAdapter == null) {
   Toast.makeText(this, "This device doesn't support NFC.",
      Toast.LENGTH_LONG).show();
   finish();
} elseif(!nfcAdapter.isEnabled()) {
   Toast.makeText(this, "NFC is disabled.",
      Toast.LENGTH_LONG).show();
   finish();
}
If you want to read the tag and launch the appropriate Activity when the app is closed, you should add such intent filter for this Activity to AndroidManifest file.
<intent-filter>
   <action android:name="android.nfc.action.NDEF_DISCOVERED"/>
   <category android:name="android.intent.category.DEFAULT"/>
   <data android:mimeType="text/plain"/>
</intent-filter>
For switching between read tag mode and write tag mode, you can create PendingIntent.
You should also create intent-filters with the following Actions.
|
Intent to start an activity when a tag is discovered. |
|
|
Intent to start an activity when a tag with NDEF payload is discovered. |
Then you should create PendingIntent for using intent-filters with these actions. PendingIntent will be used to enable foreground dispatch to the given Activity. For enable foreground dispatch we need IntentFilter arrays to handle NFC intents.
privatevoidsetIntentFilterForWritingToATag(){
   // Intent to start an activity when a tag is discovered.
   IntentFilter tagForWriteDetectedIntentFilter =
      new IntentFilter(NfcAdapter.ACTION_TAG_DISCOVERED);
   writeTagIntentFiltersArray =
      new IntentFilter[]{ tagForWriteDetectedIntentFilter };
}

privatevoidsetIntentFilterForReadingNoteFromTagOrExchangingOverP2P(){
   // Intent to start an activity when a tag with NDEF payload
   // is discovered.
   IntentFilter ndefDetectedIntentFilter =
      new IntentFilter(NfcAdapter.ACTION_NDEF_DISCOVERED);
   try {
      ndefDetectedIntentFilter.addDataType("text/plain");
   } catch (MalformedMimeTypeException e) {
      e.printStackTrace();
   }
   ndefExchangeFiltersArray =
      new IntentFilter[]{ndefDetectedIntentFilter};
}
If you want to activate read tag mode, use the method:
privatevoidenableNdefReadTagMode(){
   nfcAdapter.enableForegroundDispatch(this, nfcPendingIntent,
      ndefExchangeFiltersArray, null);
}
If you want to activate write tag mode, use the method:
privatevoidenableTagWriteMode(){
   mWriteTagModeActive = true;
   IntentFilter tagDetected =
      new IntentFilter(NfcAdapter.ACTION_TAG_DISCOVERED);
   writeTagIntentFiltersArray = new IntentFilter[]{tagDetected};
   nfcAdapter.enableForegroundDispatch(this, nfcPendingIntent,
      writeTagIntentFiltersArray, null);
}
How to write string to TAG
1) Convert your String to byte array and use it for NdefRecord initialization.
byte[] textBytes = text.getBytes();
NdefRecord textRecord = new NdefRecord(NdefRecord.TNF_MIME_MEDIA,
   "text/plain".getBytes(), new byte[]{}, textBytes);
2) Than add NdefRecord to NdefRecord array and after this set this array in NdefMessage.
NdefRecord[] records = {textRecord};
NdefMessage message = new NdefMessage(records);
3) Thereafter you get Ndef from tag and write a message using Ndef.
Ndef ndef = Ndef.get(tag);
ndef.writeNdefMessage(message);
How to read NdefMessage from Tag
1) Parse intent with action.
Parcelable[] messagesArrayInTag =
   intent.getParcelableArrayExtra(NfcAdapter.EXTRA_NDEF_MESSAGES);
2) Get NdefMessage array from Parcelable[] array.
NdefMessage messages = new NdefMessage[messagesArrayInTag.length];
for (int i = 0; i < messagesArrayInTag.length; i++)
   messages[i] = (NdefMessage) messagesArrayInTag[i];
3) Then you can parse NdefMessage with this code example.
NdefMessage currentNdefMessage = messagesArray[j];
NdefRecord[] recordForCurrentMessage = currentNdefMessage.getRecords();
NdefRecord currentRecord = recordForCurrentMessage[0];
String currentRecordPayload = new String(currentRecord.getPayload());
How to get information about TAG
You can use the following methods for Tag object:
byte[] getId() - get tag id. Should be converted to String for better reading.
String[] getTechList() - get the technologies available in this tag, as fully qualified class names.
String toString () - Human-readable description of the tag, for debugging.
To get information from Ndef object use this snippet:
Ndef ndef = Ndef.get(detectedTag);
String ndefType = ndef.getType();
int ndefMaxSize = ndef.getMaxSize();
boolean isWritable = ndef.isWritable();
boolean isCanMakeReadOnly = ndef.canMakeReadOnly();
Encryption / Decryption
We use Des Java implementation in JDK by Sun. These packages aren’t available in Android, but we inserted some classes manually. While implementing this we used the password with 8 symbols length.
DesEncryptor class provides encryption and decryption with using password.
You may download the sample project here.
Thanks for reading our article. We hope this information was helpful for you.
Kategorien
Schlagworte
Favoriteneinträge
Getting an e-Commerce website online might sound like a huge undertaking,...
WebView displays web pages. But we are interested not only in web-content...
Google Maps is a very famous and helpful service, which firmly entrenched...
RSpec is an integral part of Test Drive Development (TDD) and its main id...
When developing a web application that extensively works with user input ...
Field configuration defines behavior of all standart (system) fields and ...
As you might have already heard, the latest stuff for upgrading rails was...